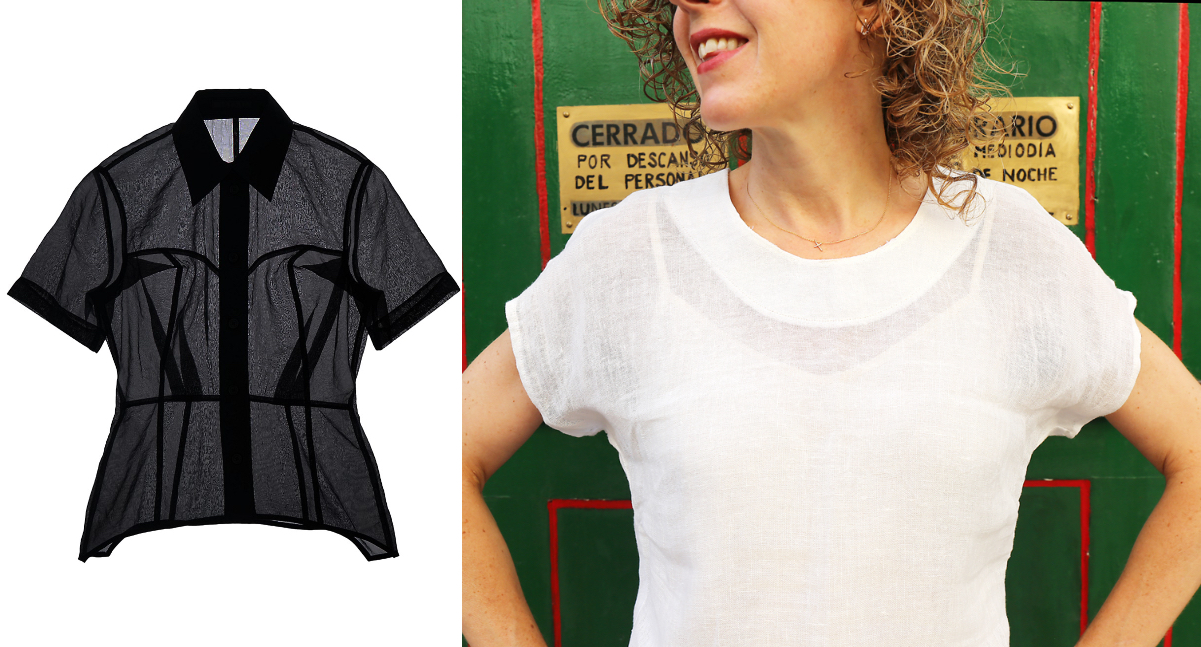
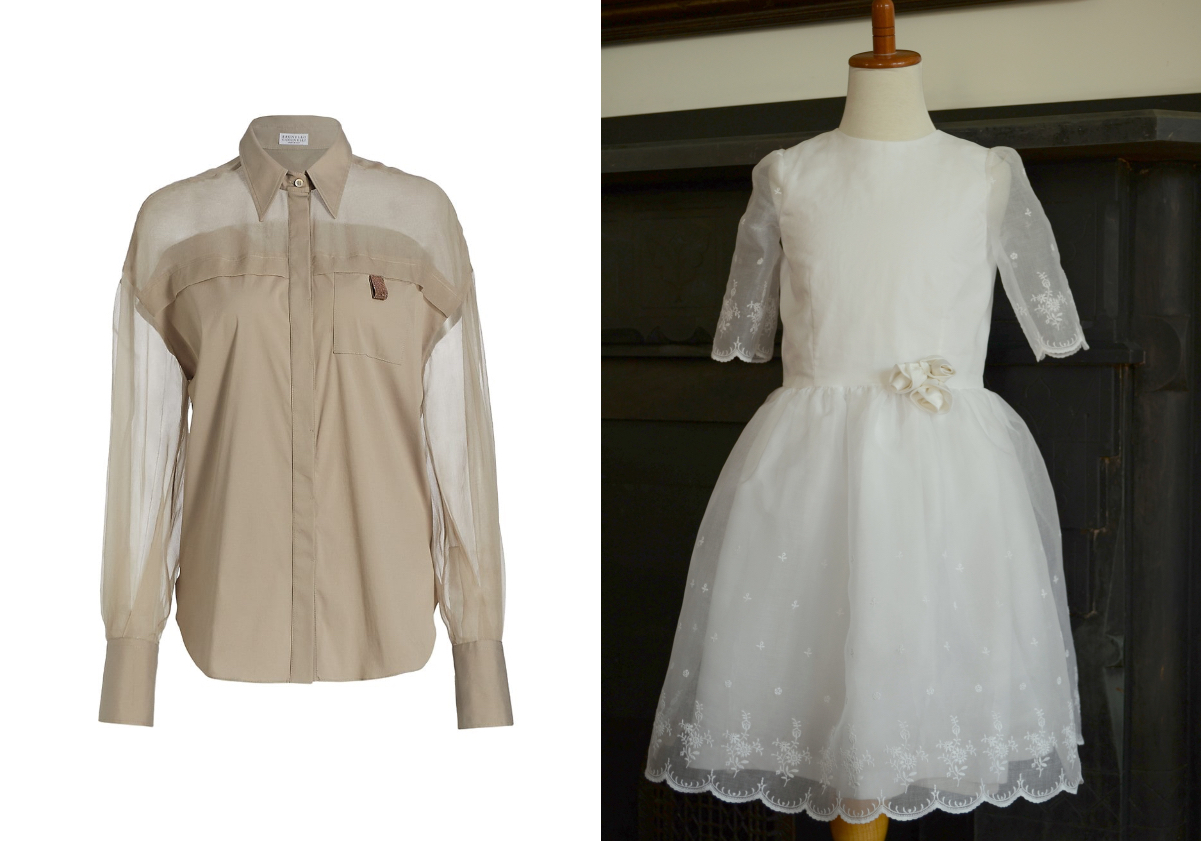
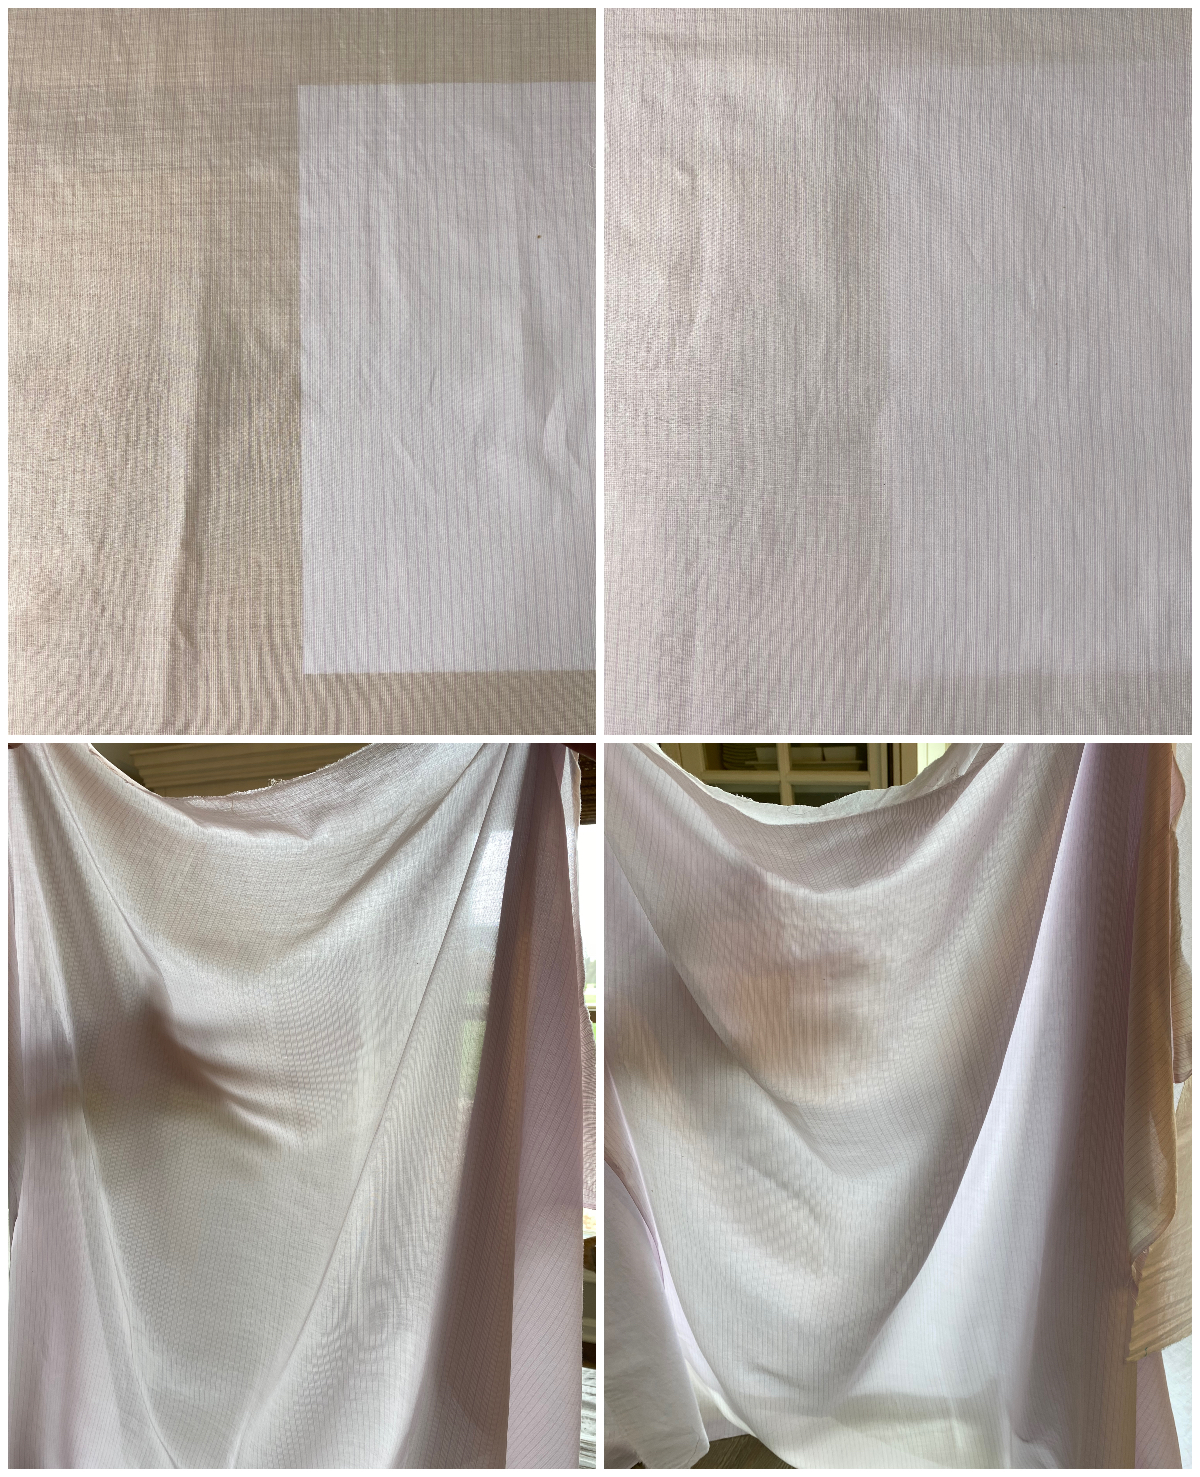
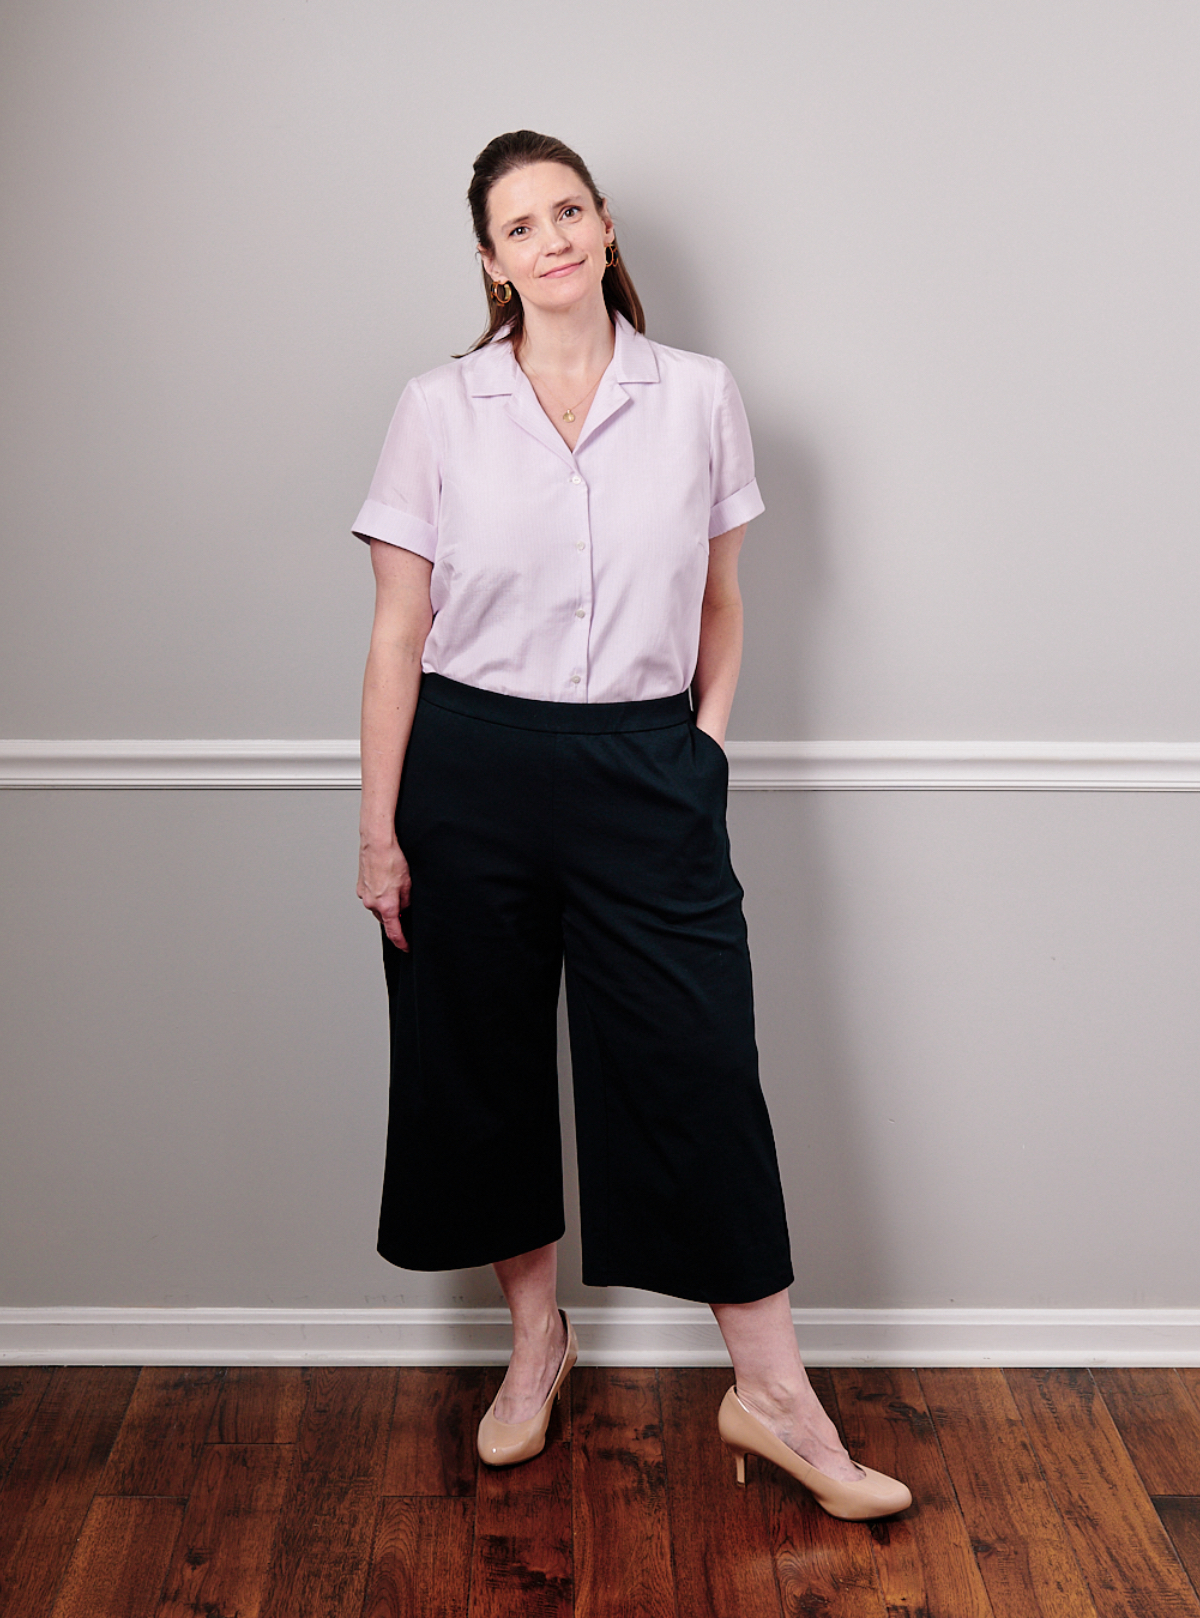
Our advisor Lyndsey always has fantastic tips to share. Today, she's dropping by with photos of her stunning Camp Shirt and some invaluable advice. Hello, I’m Lyndsey, and I’m here today to share some insights into sewing with sheer fabrics. The fabric I chose for my Camp Shirt was a very delicate silk batiste. Sheer fabrics can range from crisp materials like organdy to softer ones like chiffon. Batiste sits comfortably in the middle. Sewing with sheer fabrics requires a bit of forethought before you dive into your project. Since sheer fabric is transparent, you’ll be able to see the internal structure on the outside of your garment. Simple patterns with minimal seams and narrow hem finishes often work well with sheers. If you decide to keep your garment sheer, the seams and internal structure can become a design feature, as layering a sheer fabric introduces opacity. Take, for instance, the black blouse below. The waist seams and dart seams form horizontal design lines, while the button placket creates a strong vertical line. In Liesl’s sheer linen Verdun, the outline of the neck facing became a new style line. This approach works best if the garment will be worn over another piece of clothing, such as a camisole. On the other hand, if you prefer a more modest look or don't want to layer your garments, you can partially line or underline your sheer fabric. This means converting some pattern pieces to opaque while leaving others sheer. For example, in the tan blouse, only the front and back were underlined, while the yoke and sleeves remained sheer. This charming Fairy Tale Dress has an underlined bodice and lined skirt, with the sleeves left sheer. Finally, you can fully line or underline your garment to make it completely opaque. I went with this option for my Camp Shirt. The fabric I bought was very sheer, but the Camp Shirt + Dress pattern includes a facing, collar, darts, and cuffed sleeves. I felt these elements would be too distracting in the finished garment. So, I underlined each pattern piece with a lightweight cotton batiste. Underlining is a technique where a second fabric is used beneath your main fabric to change its body, add support, or conceal inner construction details. For this project, I didn’t want to alter the body of my fabric; I just wanted to hide the inner construction. I chose a lightweight cotton batiste for the underlining fabric. To ensure the batiste wouldn’t add too much body, I simply layered the two fabrics together to check the drape. The images below show the sheer fabric on the left and the underlined fabric on the right. Depending on how many pieces your garment requires, this process might take some time. I usually cut all the pieces in one night and save the basting for a cozy evening in front of the TV. One last tip: I typically staystitch before I underline. While there’s no specific guidance on this, I like to staystitch immediately after cutting to ensure the bias edges maintain their shape. Underlining involves more handling of the fabric, and I don’t want to risk distorting the neckline or other bias edges during the basting process. With a bit of extra planning, you can create entirely different looks from the same pattern using sheer fabrics! I’m thrilled with how my Camp Shirt turned out.
We have a various printing pin badge,It can made of Zinc alloy, Steel, Brass, Aluminum etc. Plating Nickel or Anti-Nickel, Black, Golden, Silver, Metal colors, rainbow color etc.customized logos and designs are welcomed, Logo Silk or Pad printing,Paper sticker + epoxy dome, offset printing,Heat transfer, Punch etc,
Function and Use: Pin on clothes or magnet on clothes, and used for promotion gift and giveaway gift,or other business souvenir gifts.
Custom Metal Pin Badge,Pin Badge Custom Metal,Personalised Pin Badge,Printing Pin Badge Metal Shenzhen MingFeng Art & Craft Products CO., LTD. , https://www.mf-gift.com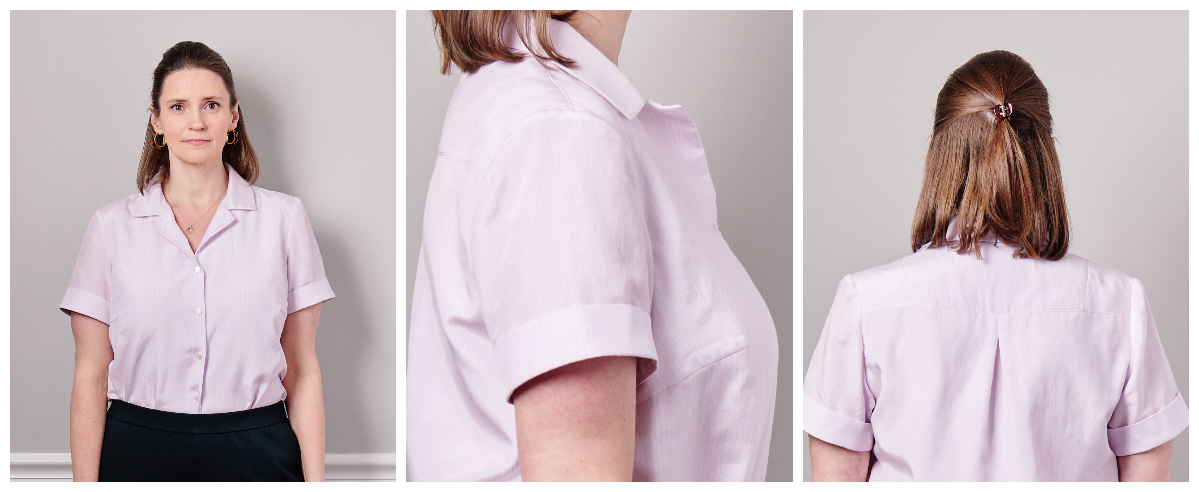
Pattern Considerations for Sheer Fabrics
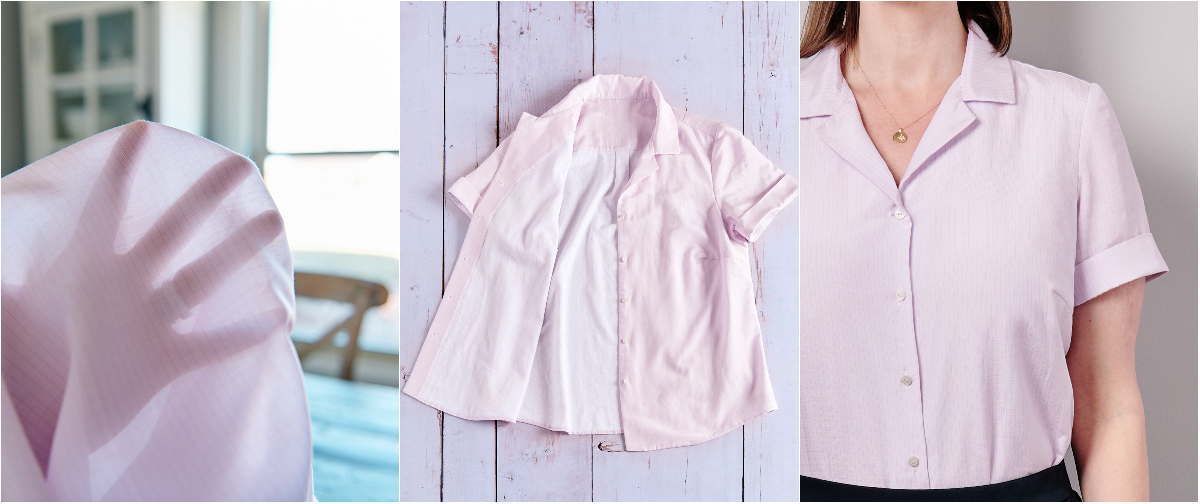
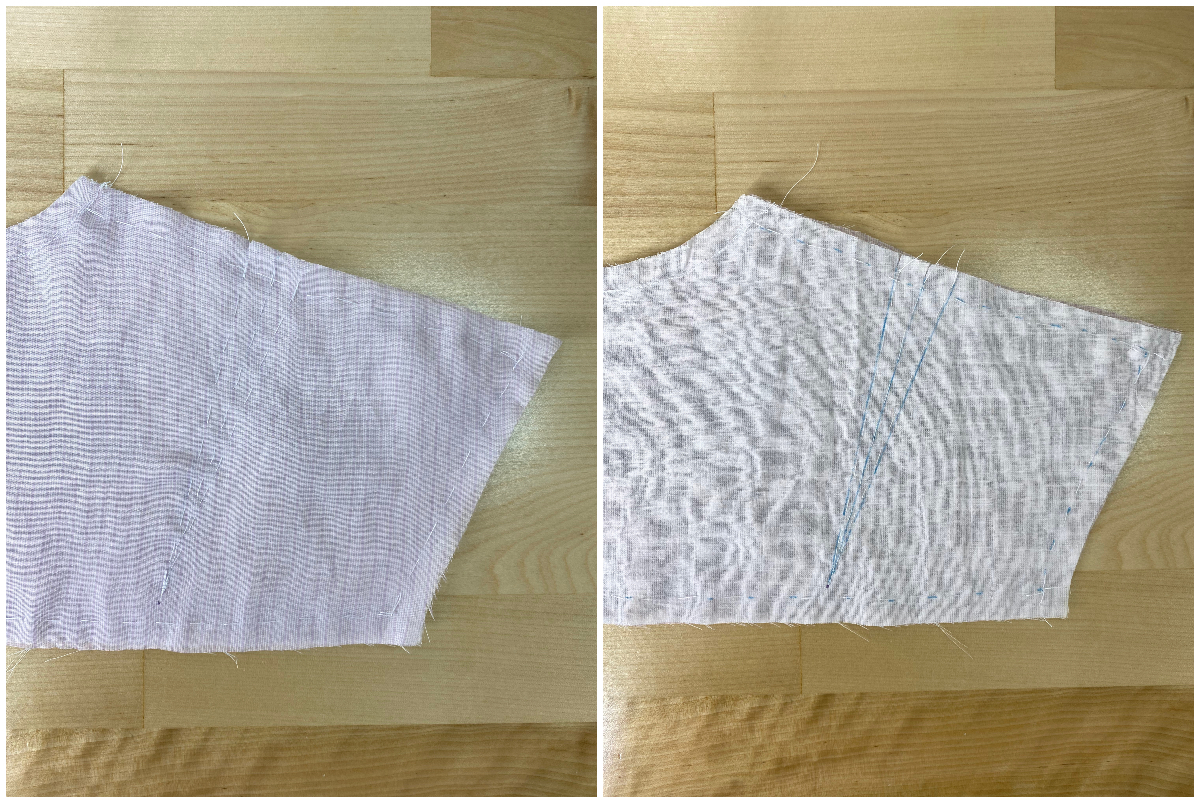
How to Underline Your Sheer Fabric
Steps for Underlining
(adsbygoogle = window.adsbygoogle || []).push({});
Â