Canvas Fabric,Canvas Fabric Printing,Canvas Fabric Waterproof,Breathable Fabrics Canvas Shaoxing Yingcheng Textile Co.,Ltd , https://www.sxyingcheng.com
liesl + co. classic shirt as a dress, all the details
This week, I’ve been sharing how you can transform the Liesl + Co Classic Shirt pattern into a stylish shirt dress, and today marks the final step in the process. If you’re just joining us, this is step three. First, you’ll need to extend the pattern to dress length. Then, follow our free popover placket pattern piece and tutorial to create the front placket. Now, let’s dive into today’s finishing touches: inverted box-pleat pockets and a self-tie.


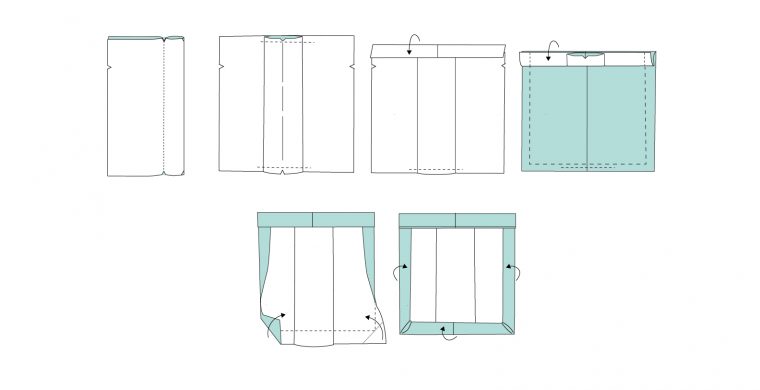
### The Inverted Box-Pleat Pockets
To craft the inverted box-pleat pockets, I started by basting the View B pockets with their right sides together. After that, I followed the standard sewing instructions but flipped the top hem edge inward to ensure the pleat would sit on the inside of the pocket. Once the basting threads were removed, I had a lovely dimensional effect. It’s subtle but adds a touch of elegance—maybe it makes the dress feel a bit more formal. Either way, I love the result! For clarity, I’ve mirrored the View B illustrations below to guide you.
### The Self-Tie
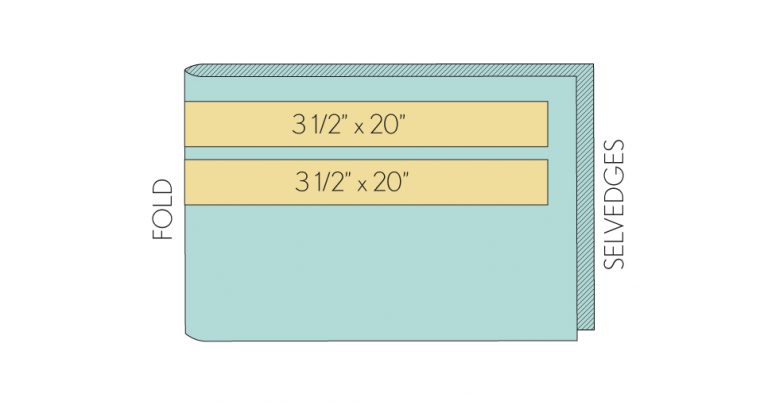
For the self-tie, I cut two fabric strips measuring 3 1/2 inches wide and 40 inches long. If you prefer, you can cut these on the fold, making each strip 20 inches long. Feel free to adjust the length to suit your preference.
Here’s how to assemble the tie:
1. Pin the short ends of the two strips together with their right sides facing each other. Stitch them along the short edge to create one continuous tie. Press the seam allowances open, then fold and press the remaining unsewn short ends of the tie by 1/2 inch toward the wrong side.
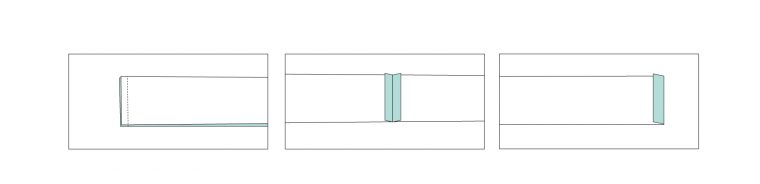
2. Unfold the pressed ends and fold the tie in half lengthwise, aligning the right sides and raw edges. Sew along the length of the tie with a 1/2-inch seam allowance and press the seam open.

3. Turn the tie right-side out using a safety pin or bodkin. Tuck the short ends inside, guided by the previous folds you made. Finger-press the tie to align the seams neatly, either along one edge or down the center of one side.
4. Finally, close the short ends of the tie by hand with a whipstitch or by machine using an edgestitch.
And there you have it! Your self-tie is complete. You can wear it as a belt or sash, or even tie it around the neck of the dress for a chic pussy-bow look.
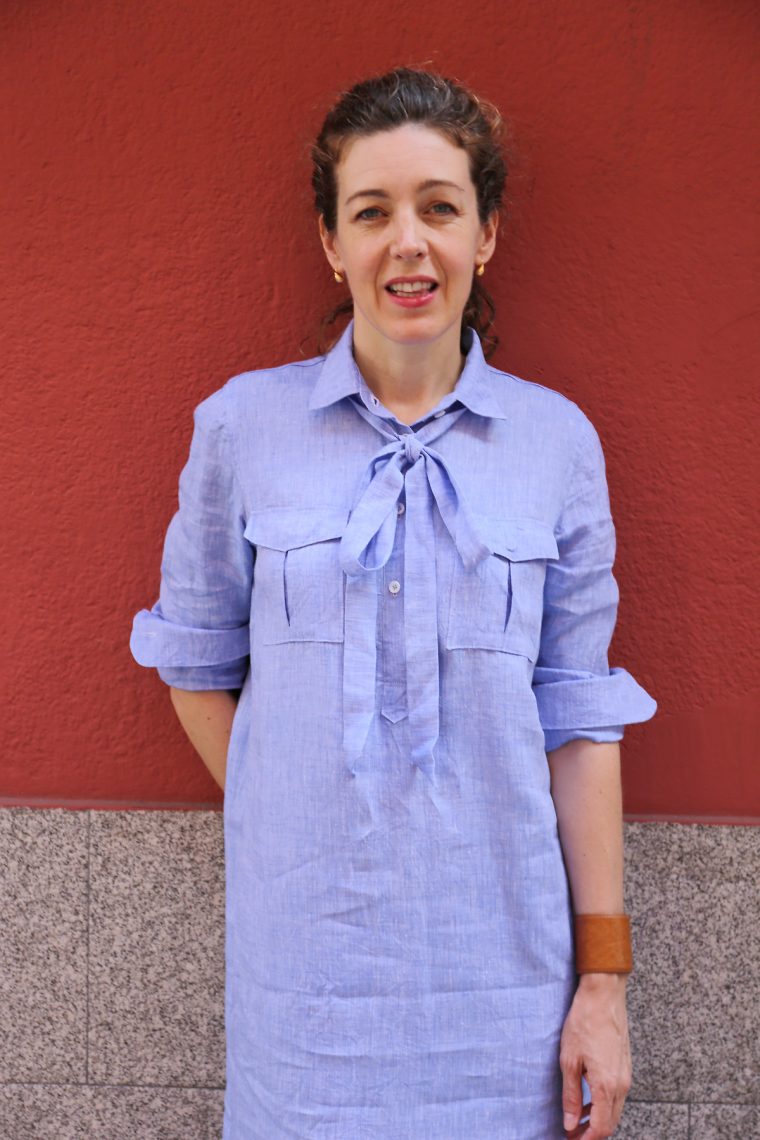
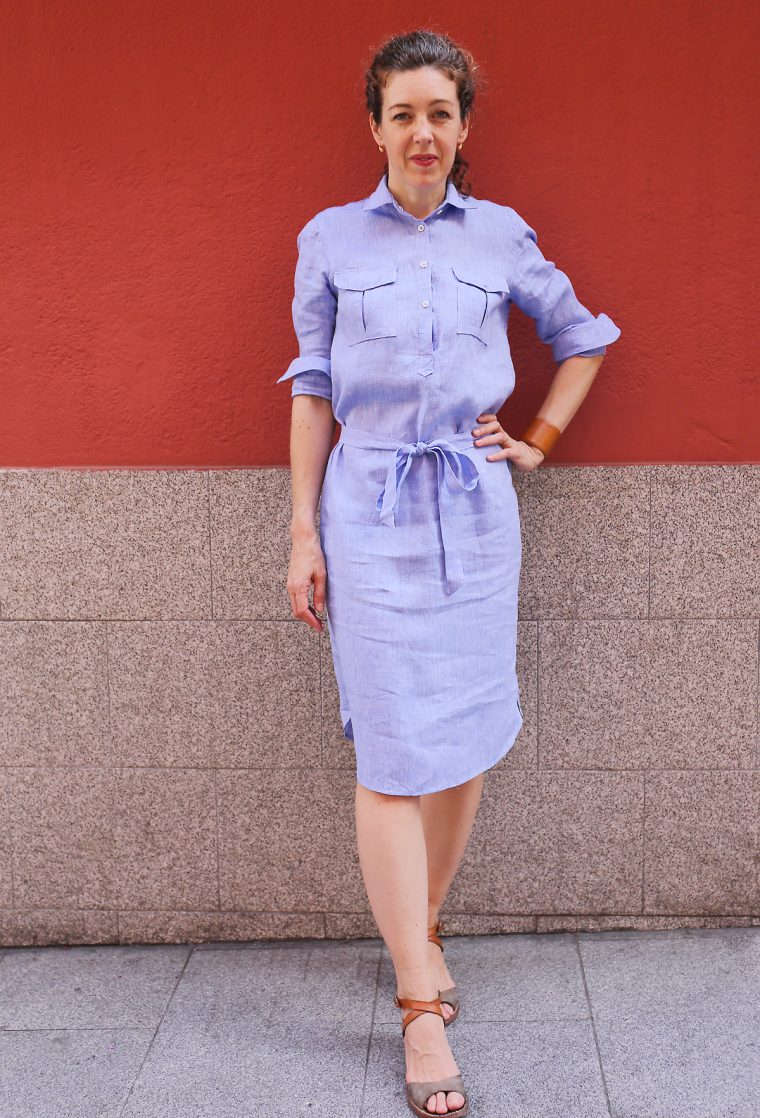
I hope you enjoy your new Classic Shirt dress! It’s versatile, stylish, and uniquely yours. Let me know how your project turns out—I’d love to see your creations.
---
*PS: If you have any questions or need further guidance, feel free to reach out. Happy sewing!*